The Only Watercolor Brush You Actually Need to Get Started (+ 5 Ways to Use It)
Disclosure: This post may contain affiliate links. That means if you buy something we may possibly get a small commission at no extra cost to you.
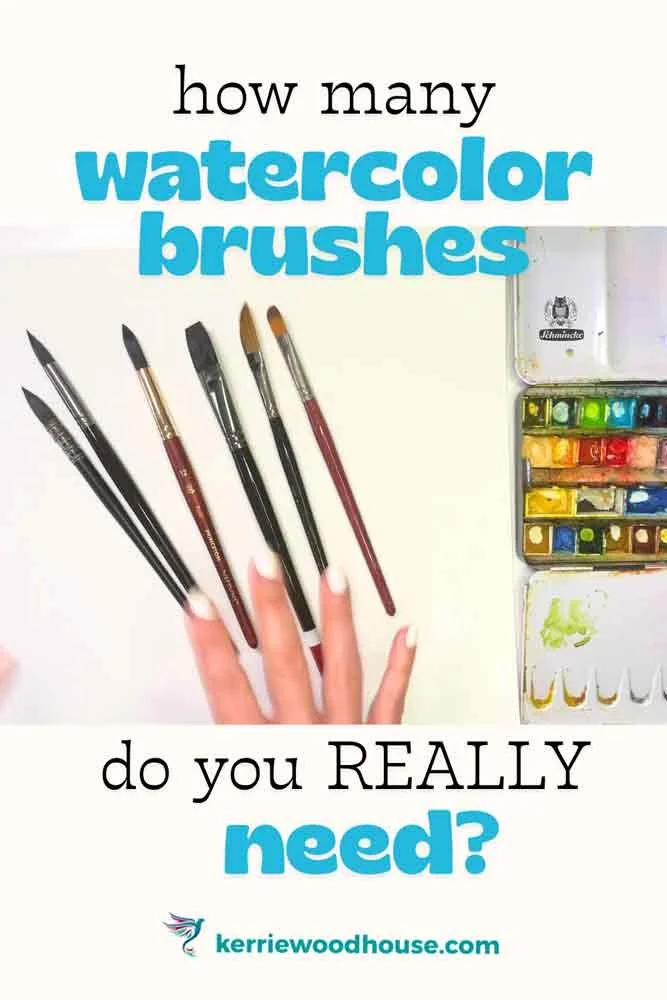
Do you need more than one watercolor brush to get started painting? Well, as long as you choose the right brush and learn how to get the most out of it, the answer is no.
One brush is really all you need.
But which one? Read on to find out!…
Let's talk about which brush to choose, and I'll show you the five essential techniques that you'll find so useful that it'll feel like that one little brush is actually five different brushes rolled into one.
I have written descriptions for all the watercolour brush techniques - you’ll find them below, but I also have a video version. I thought you might quite like a chance to see just how you would apply each of those different techniques in a little quick floral painting.
The Essential Brush: The Large, Soft, Round
If you're only going to choose one brush, which one should you go for? My favorite brush that I always seem to reach for is a large round. That's what I recommend everybody starts out with. I think it's the essential brush to have in your kit, and really, I don't think you actually need anything else. You can get by with just that one brush.
There are 3 main qualities of a brush that you will need to make decisions about when you are choosing:
shape
bristles
size
The shape I suggest is a round shape—it's probably the typical sort of brush that pops into your head when we talk about a paintbrush. Alternatives might be something like a flat brush (which has a flat edge), a dagger brush, or even a filbert (which has a slightly rounded tip at the top). They're all wonderful brushes, and they all have their uses, but honestly, I think when you're starting out, it just creates another set of complications and more decisions for you to make.
Speaking of the dagger brush specifically—it's actually one of my favourite specialty brushes, and I get asked about it a lot! If you're curious whether a dagger might be better than a round for beginners, I've done an honest, detailed review comparing both.
You might be surprised by my conclusions about which one actually gives you more control and versatility when you're starting out.
Check out my full comparison: Is the Dagger Brush the Best Watercolour Brush for Beginners? (Honest Review)
Why Choose a Large Round?
I also said I would choose a large round - thats the size decision. I know it can be tempting to go for a little brush because you're thinking it's going to give you a bit more control and help you with some of those tiny details that we all worry about when we start painting.
But if you're choosing to embrace the sort of loose, expressive approach to watercolour (which I highly recommend—it's what I'm all about), then I think those small brushes will actually do you a grave disservice. What they tend to do is make you start worrying about getting things perfect, which is not what you want at all.
And I'll show you just how much detail you can get with a brush even as large as this!
Choosing Your Large Round: What to Look For
While I keep emphasising that one brush is enough, you do want to make sure you choose the right one! Here's what to consider when shopping for your perfect large round:
Bristle Types:
Natural hair (like kolinsky sable): Holds more water and paint, comes to the finest point, but more expensive
Synthetic bristles: More affordable, easier to clean, great for beginners and still very versatile
Mixed bristles: A good compromise between performance and price
Handle Length:
Long handles: Better for larger paintings and arm movement- mostly made for oil/acrylic painters working at an easel
Short handles: Easier to store, better if you have limited workspace
Price Ranges: Don't feel you need to spend a fortune! A good quality synthetic large round will serve you beautifully. I've found that spending much more than that gives diminishing returns, especially when you're learning. Plus it makes you start worrying more about whether you are worthy of the brush than just enjoying painting.
Size Guidelines: Look for something that is about as chunky as the barrel of a marker/pen at the ferrule (that’s the metal bit that holds the bristles onto the handle). There will be numbers indicating size, but remember, sizing varies by manufacturer.
If it looks "too big" in the store, it's probably perfect! You want something that feels substantial in your hand.
Note: Don't pay much attention to the exact size numbers on brushes because they vary across manufacturers. Mop brushes are very similar to rounds in my opinion—they tend to have a few more bristles, but they all have lots of long bristles and come to a nice fine point.

The Five Essential Techniques
Let's take a round brush and see what different marks we can make with it. (Don’t forget there is a video version of this post at the top - scroll back up to find it or click here.
The round brush has long bristles and quite a few of them, which gives us incredible versatility.
1. Using the Full Belly of the Brush
We can really load those bristles up with paint by rolling them around in the paint. If we press our brush onto the page using the full belly of the brush, we can make a very big mark.
We can cover great spaces with paint or water—it's a very efficient brush for covering large spaces and can hold lots of juicy paint, which is fantastic when you want to put a lot of color or water down onto your page very quickly and easily.
2. Painting with the Tip
The other characteristic of this round brush is its fine point. Now, not only do we have the ability to make a big broad mark, but we can paint with just the very tip of the brush.
To do this most effectively, hold it perpendicular to the paper—straight up and down. Then you're painting just with the very tip, and you'll find that you can paint really fine lines. It's quite amazing to think that this enormous brush could create tiny little lines!
When you paint with the very tip using very little pressure, the big round brush is acting almost like a rigger (a brush made for making very fine lines).
3. Pressure and Release Technique
The long bristles in a round brush are quite expressive compared to something like a flat brush where the bristles don't move all that much. These are quite soft and flexible, which means we can vary the pressure to get different marks.
As well as painting with the belly or painting with the tip, we can use a pressure and release approach to create various organic shapes. We can create leaf or petal shapes by pressing and releasing. If we're thinking of something like a poppy, we could be putting in petals by thinking about how the shape of the brush can be pushed across the page to make whatever shapes you're seeing in your reference or in your mind.
Whether you're wanting to paint a more structured, realistic-leaning style of flower or your looser, more abstract type of flower, we've just used the brush in slightly different ways to create completely different sets of marks.
4. Splattering
The fourth thing you can do with your brush is splatter. Once I learned how to do this splattering, it's something that crept into almost all of my paintings. It's such a lovely way to add a bit of energy and fun to the end of the painting, and it's also something I tend to do throughout the painting either to add texture or to remind myself to loosen up a bit.
All you do is load up your brush—you need it quite juicy with a good mixture of water in with your paint. Then you tap the brush and paint droplets will fly over your page.
You have limited control over this, but holding the brush and tapping gives you a little more control.
If you want to be really wild and have some exciting splashing, you can put your whole arm into it and do more of a flicking motion.
5. Splaying the Bristles
The fifth technique might feel a little uncomfortable at first, but we're not really mistreating the brush because we've got so many bristles—we can actually spread them out a little bit. Load up with paint on the tip, and just by splaying out the bristles, you're going to get a completely different set of very fine, exciting marks. Great for grasses or maybe wood grain texture.
Don't be alarmed—the bristles will go straight back together, and all you need to do to restore it completely to its former glory is rinse it in water.
If you're fascinated by the different marks and techniques you can achieve with various brush shapes and want to dive deeper into brush strokes, I've got you covered!
I have a comprehensive guide that explores how to let your brush do the work for you, covering everything from flat brushes to filberts to specialty shapes. It's packed with practical techniques and includes shopping recommendations for when you're ready to expand your brush collection: Watercolor Brush Strokes - Let your Brush do the Work!

Putting It All Together: A Quick Floral Painting
Let me show you how all these techniques work together in a loose floral painting (scroll up to see the video version or click here):
Background: Using the fat belly of the brush to put in water first, then paint. It's quite an efficient way to work—my lovely big round brush helps me splash in lots of water and colour to spread out evenly. I like a little variation in colour rather than a plain flat wash, blending it so it becomes paler toward the bottom where I'll add grasses.
Flower petals: Using that pressure and release technique to create organic poppy shapes. I press the belly of the brush against the page and slide it along to create natural petal shapes, letting the brush wiggle around to suggest feathery petal edges blowing in the wind.
Stems: Using the very tip of my brush with light pressure for fine marks—no need to swap to a tiny brush at all.
Grass: Using pressure and release again, where the grass blade is wide at the bottom (more pressure) and slowly releasing to end up with a fine tip and slight flick.
Textured grass: Splaying the bristles so they become like a fan brush, automatically painting multiple fine strands as I flick the brush.
Poppy seed heads: Back to using just the tip for fine stems and small oval shapes for the seed heads.
Layering: Adding another layer of paint to the flowers because poppies are transparent and you can see one set of petals through another—watercolour paint is also transparent, so you get a nice effect layering up the paint.
Finishing touches: Some splatter in pink and green to add life and energy—such a fun way to finish off a loose, expressive, quick watercolour painting!
Final Thoughts on Brush Selection
I don't think you need to spend an awful lot of money on brushes. I haven't found too much difference between the ones that are relatively inexpensive and the ones that feel quite exorbitant. As long as you've got your large round and you're equipped with these five different ways to use it, I think you've got enough versatility that you probably don't need any other brushes.
Need is different from want, of course, but that's another story!
One thing that's worth knowing is when to say goodbye to your beloved brush and invest in a replacement. Even the best brushes don't last forever, and continuing to use a brush that's past its prime can actually hold back your painting progress.
I've put together a detailed guide on the telltale signs that it's time for a new brush, plus tips on extending your brush's life: When to Replace Your Brushes. Trust me, knowing when to let go can make a huge difference in your painting results!
Personally, I would choose to spend a little less money on brushes and paint and a little more money on watercolour paper. Of all three supplies, it's the watercolour paper that's going to make the biggest difference to your paintings.
Why yes… I do have a post all about that watercolour paper too - here’s the link
Are you on your own painting journey?
One of these might be useful…


Keep on reading…