Disclosure: This post contains affiliate links. That means if you buy something we may possibly get a small commission at no extra cost to you.
Are you wondering about the best brushes for watercolour?
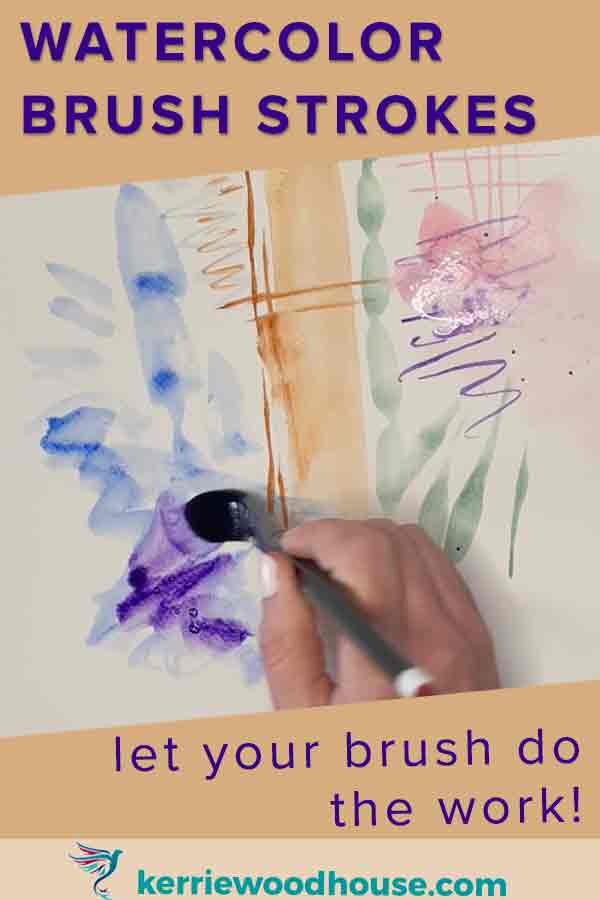
Let’s talk about choosing the right brush for watercolour painting and more importantly, the brush techniques that will give you the most effective watercolor brush strokes - even if you are a beginner.
By they way, if you are looking for more information about watercolour supplies, you might be interested in joining my free watercolour supplies class.
What brushes should you use for watercolour?
Watercolour painters need short handled brushes with long absorbent bristles. The thick consistency of oil and some acrylic paint requires a firm bristle brush but watercolour is just the opposite.
Watercolour painters want a soft brush that soaks up plenty of water and paint which it easily releases onto the page. The soft bristles in a good watercolour brush then spring back to their original shape once they have released the water and or paint.
The material that has ticked all these boxes in days gone by is animal hair - notably sable.
You may well have heard of the high end Kolinsky Sable brushes prized for their ability to keep a fine point. Squirrel hair holds more water than sable but doesn’t spring back quite as much. You will come across other types of animal hair, camel or goat perhaps, at slightly lower price points.
Not everyone is comfortable with animal hair products and luckily these days we have many excellent synthetic alternatives.
Sometimes these synthetic brushes can be even better than the natural hair ones. They are often more durable and cheaper too. Win, win.
I recently got the chance to try out this variety pack of brushes. If you keep reading you will see me trying them out and painting with them.

Keep reading to see the 🍿 video version 🎥 of me testing out these brushes, explaining how to use them and creating this painting…
How many brushes do you need for watercolour?
In my opinion, all you really need is one brush.
Yes, just one brush is all it takes to paint something.
But of course its a bit like shoes… we may only need one pair of shoes… 👠 but … well, you know what I’m saying!😉
And so it is with brushes. There is a large variety of different brushes and each shape has its own advantages.
If my first aim is to keep things simple with my painting, the next goal would be maximise efficiency by choosing the brush that makes your life easiest. This is going to depend on your painting style and subject.
Types of Watercolour Brushes and Their Uses:
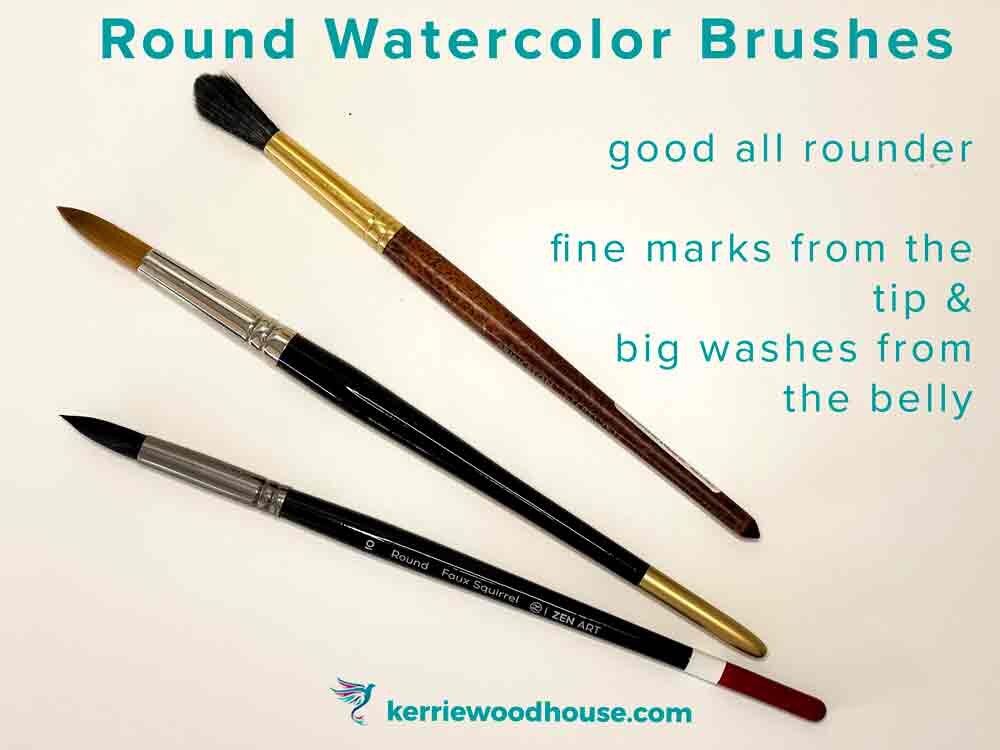
Round Watercolour Brushes
If you just want to start with one, I always recommend a big fat round brush.
So called because the bristles are bound in a perfect round shape. A good round that comes to a sharp point is multi talented workhorse of a brush. You will be able to get wide marks and fine marks out of the one brush, depending on the way you apply it to the paper.
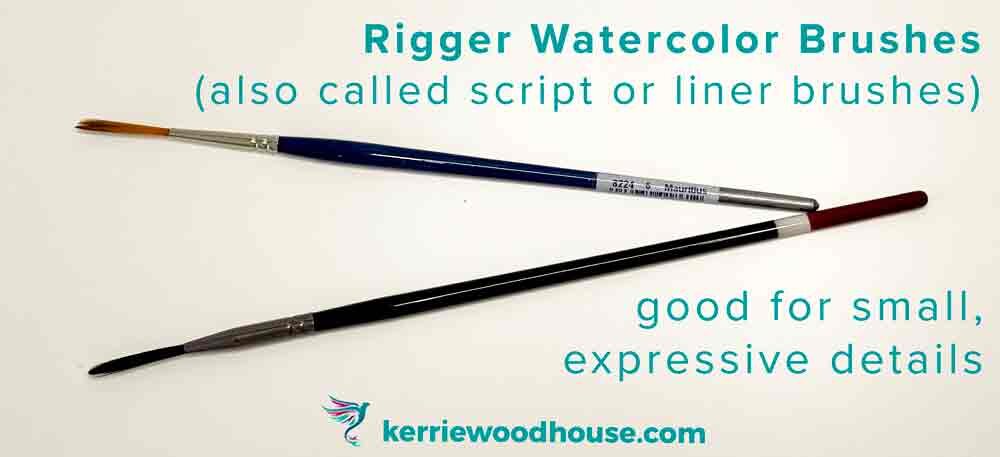
Rigger Watercolour Brushes
My next favourite brush is a rigger.
This is a very fine brush but it has long bristles. I love its whippy flexibility for unpredictable, calligraphic mark making. You may also find these or similar brushes to these being described as script or liner brushes.
Flat Watercolour Brushes
A flat brush has been bound in a flat rectangular shape rather than a round shape like a rigger or a round brush. The tip of the brush is a flat edge rather than a point making it ideal if you are painting straight edges and angular boxy shapes. Of course you can paint straight edges with a round brush - the flat just makes the job much easier.

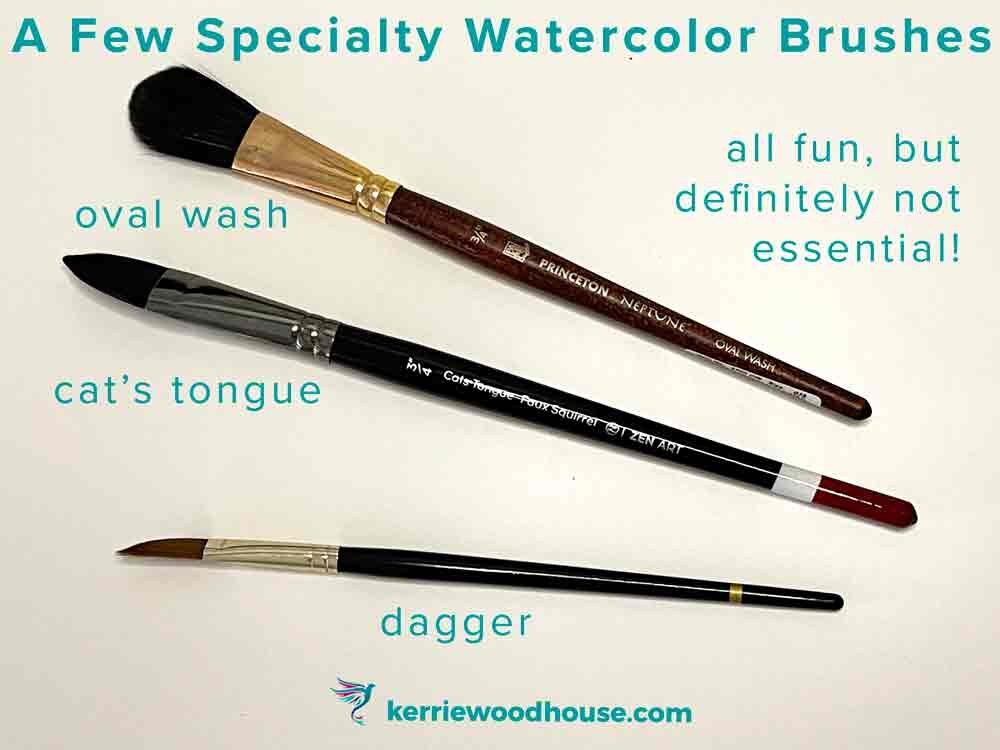
Other Interesting Watercolour Brush Shapes
There are many other interesting shapes available including but not limited to:
Dagger - lovely angled brush - to me it feels like a flat, round and rigger rolled into one
Cat’s Tongue - large, curved v shape that holds lots of paint and water, makes a variety of marks and has a beautiful sharp point
Mop/Oval Wash - large and absorbent, good for large washes
Rake - flat and wide with an irregular edge, good for painting grass
Of those my favourite are the dagger and cats tongue because they offer the biggest variety of marks from a single brush. This suits my preferred loose style of painting.
You don’t need any of them, but that’s not to say that you might want one or two of them!
A small variety pack like this is a great choice when you are a beginner.
It gives you a chance to try out a few brushes to see what suits you best. There is no need to equip your studio with every watercolour brush shape available when you are just starting out.
Maximise the Brush Strokes you can get from each Watercolour Brush
Really it's not the tools, it's the workman.
What I mean is that it doesn't really matter which brush you choose. What is important is understanding what marks you can get out of the brush.
That said, surely it is a wise workman who chooses the most efficient tool.
It is worth giving some attention to the way you apply the brush to the page.
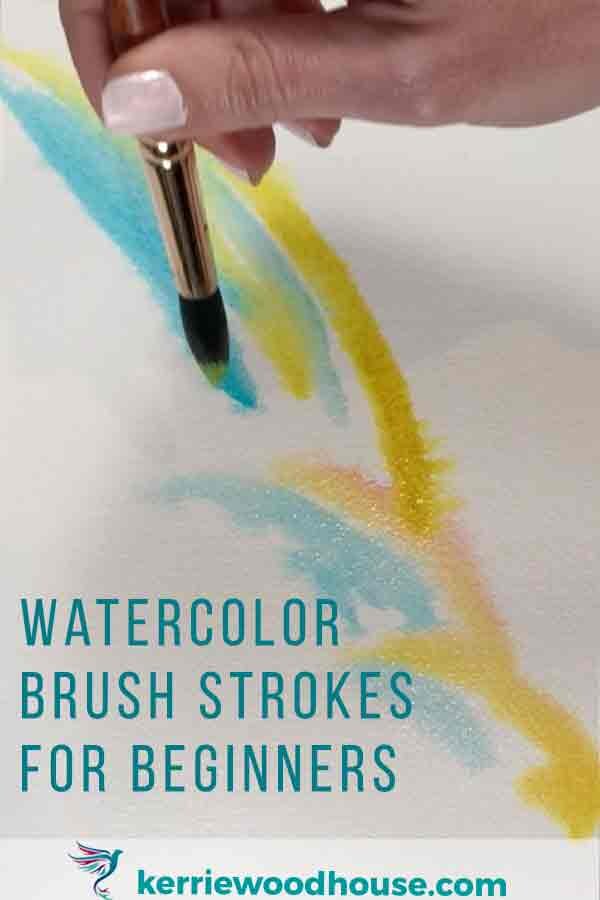
Here are a few Tips and Techniques you can try to Maximise your Brush Strokes:
Use the brush perpendicular to the page and you will get a fine brush stroke by painting with only the very tip of the brush.
Press the belly of the brush into the page and you will have a nice generous mark - wide and juicy, as the bristles release all their charge.
When you press the brush into the page it will print its own shape like a stamp. Try turning your hand to different angles so that the stroke the brush makes is different each time.
Play with varying the pressure you use. The lightest of pressure makes the smallest possible mark from the brush and the lightest since only the smallest amount of paint will be released. More pressure will increase the size of the brush stroke and the amount of paint creating a larger and possibly darker stroke.
Try varying the pressure mid stroke. You can paint lovely leaf shapes like this - begin with the tip, press the belly down as you begin the stroke and then slowly release the pressure again, returning to the tip
How do you Practice Watercolour Brush Strokes?
In total honesty, I must declare that I don’t practice brush strokes per se.
What I mean is that while you will very often see watercolour teachers recommending (or insisting!!) that you fill pages of ‘practice sheets’ with lines and various brush strokes, I just can't bring myself to do that.
Of course that will teach you control.
But aren’t you going to get bored?
And doesn’t it feel like a waste of paper?
That’s how I see it anyway. I am open to the possibility that there are those who find that sort of thing meditative, but I don’t.
I am also not all that big on control anyway, since I favour the loose over the detailed style any day.
(Wondering what I mean by ‘loose painting’ - this article will explain it all!)
I do think that brush hours will equate to greater ease and confidence in painting. It’s just that I would rather clock those up painting actual things rather than practice sheets.
Personally, I’d rather paint a cat/tree/landscape/floral than a row of lines.
Better to ‘waste’ paper on an actual painting (even a bad one) than on a boring drill, I say.
Of course it might be a bit of a rubbish painting if I am still learning (and aren’t we all learning, all of the time, anyway?).
Either way I am racking up the brush miles - this just seems more fun.
And I’d rather get in the habit of creating paintings than build the habit of being in practice and preparation mode.
That just makes it much scarier when you finally do come to paint a subject rather than a bunch of lines.
Don’t forget - if you want to learn more about watercolour supplies I have a whole class all about that. It’s free, and you can sign up here.

The Beginner’s Guide to Watercolour Supplies
Are you on your own painting journey?
One of these might be useful…


Keep on reading…


